|
|
|
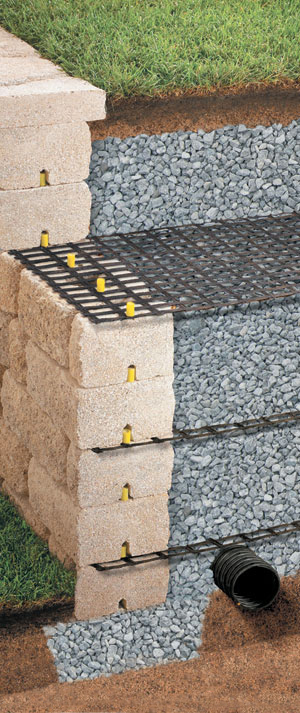
INSTALLATION
| INSTALLATION STEPS | |
Step 1:Excavate reinforced soil area. Remove existing soils in the reinforced soil area to the maximum embedment length of the geo-grid design. Provide a generally level soil condition behind the wall units for the placement of each geo-grid layer. |
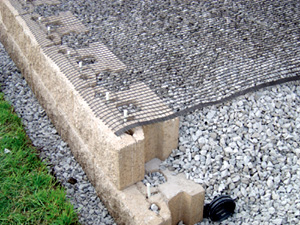
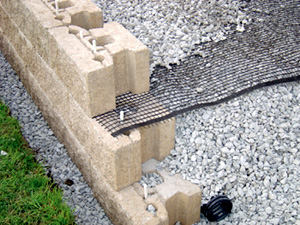
Step 4: Secure Geo-grid. Pull the pinned geo-grid taut to eliminate loose folds. Stake or secure back edge of geo-grid before and during backfill and compaction. Remove stakes, if desired, once backfill is placed. Place additional sections of geo-grid, abutting each other, for continuous coverage at each layer.
|
Step 2: Cut Geo-grid. Cut sections from geo-grid roll to the specified length (embedment depth). Geo-grid roll direction is from the wall toward the embankment (check manufacturer's criteria). In most cases correct orientation is to roll the geo-grid perpendicular to the wall face..
|
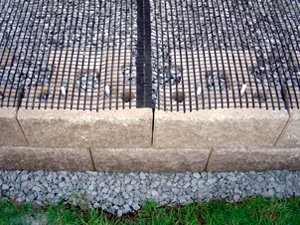
Step 5: Install next course of Keystone units. Check for level with each new course. |
Step 3: Install Geo-grid. Hook geo-grid over the fiberglass pins to ensure a positive mechanical connection between the unit and geo-grid |
Step 6: Place compacted backfill over geo-grid in 8” lifts. Provide a minimum of six inches reinforced fill coverage prior to driving equipment over the geo-grid with wheeled or tracked equipment. Avoid driving or turning equipment directly on geo-grid to avoid excessive damage. |